

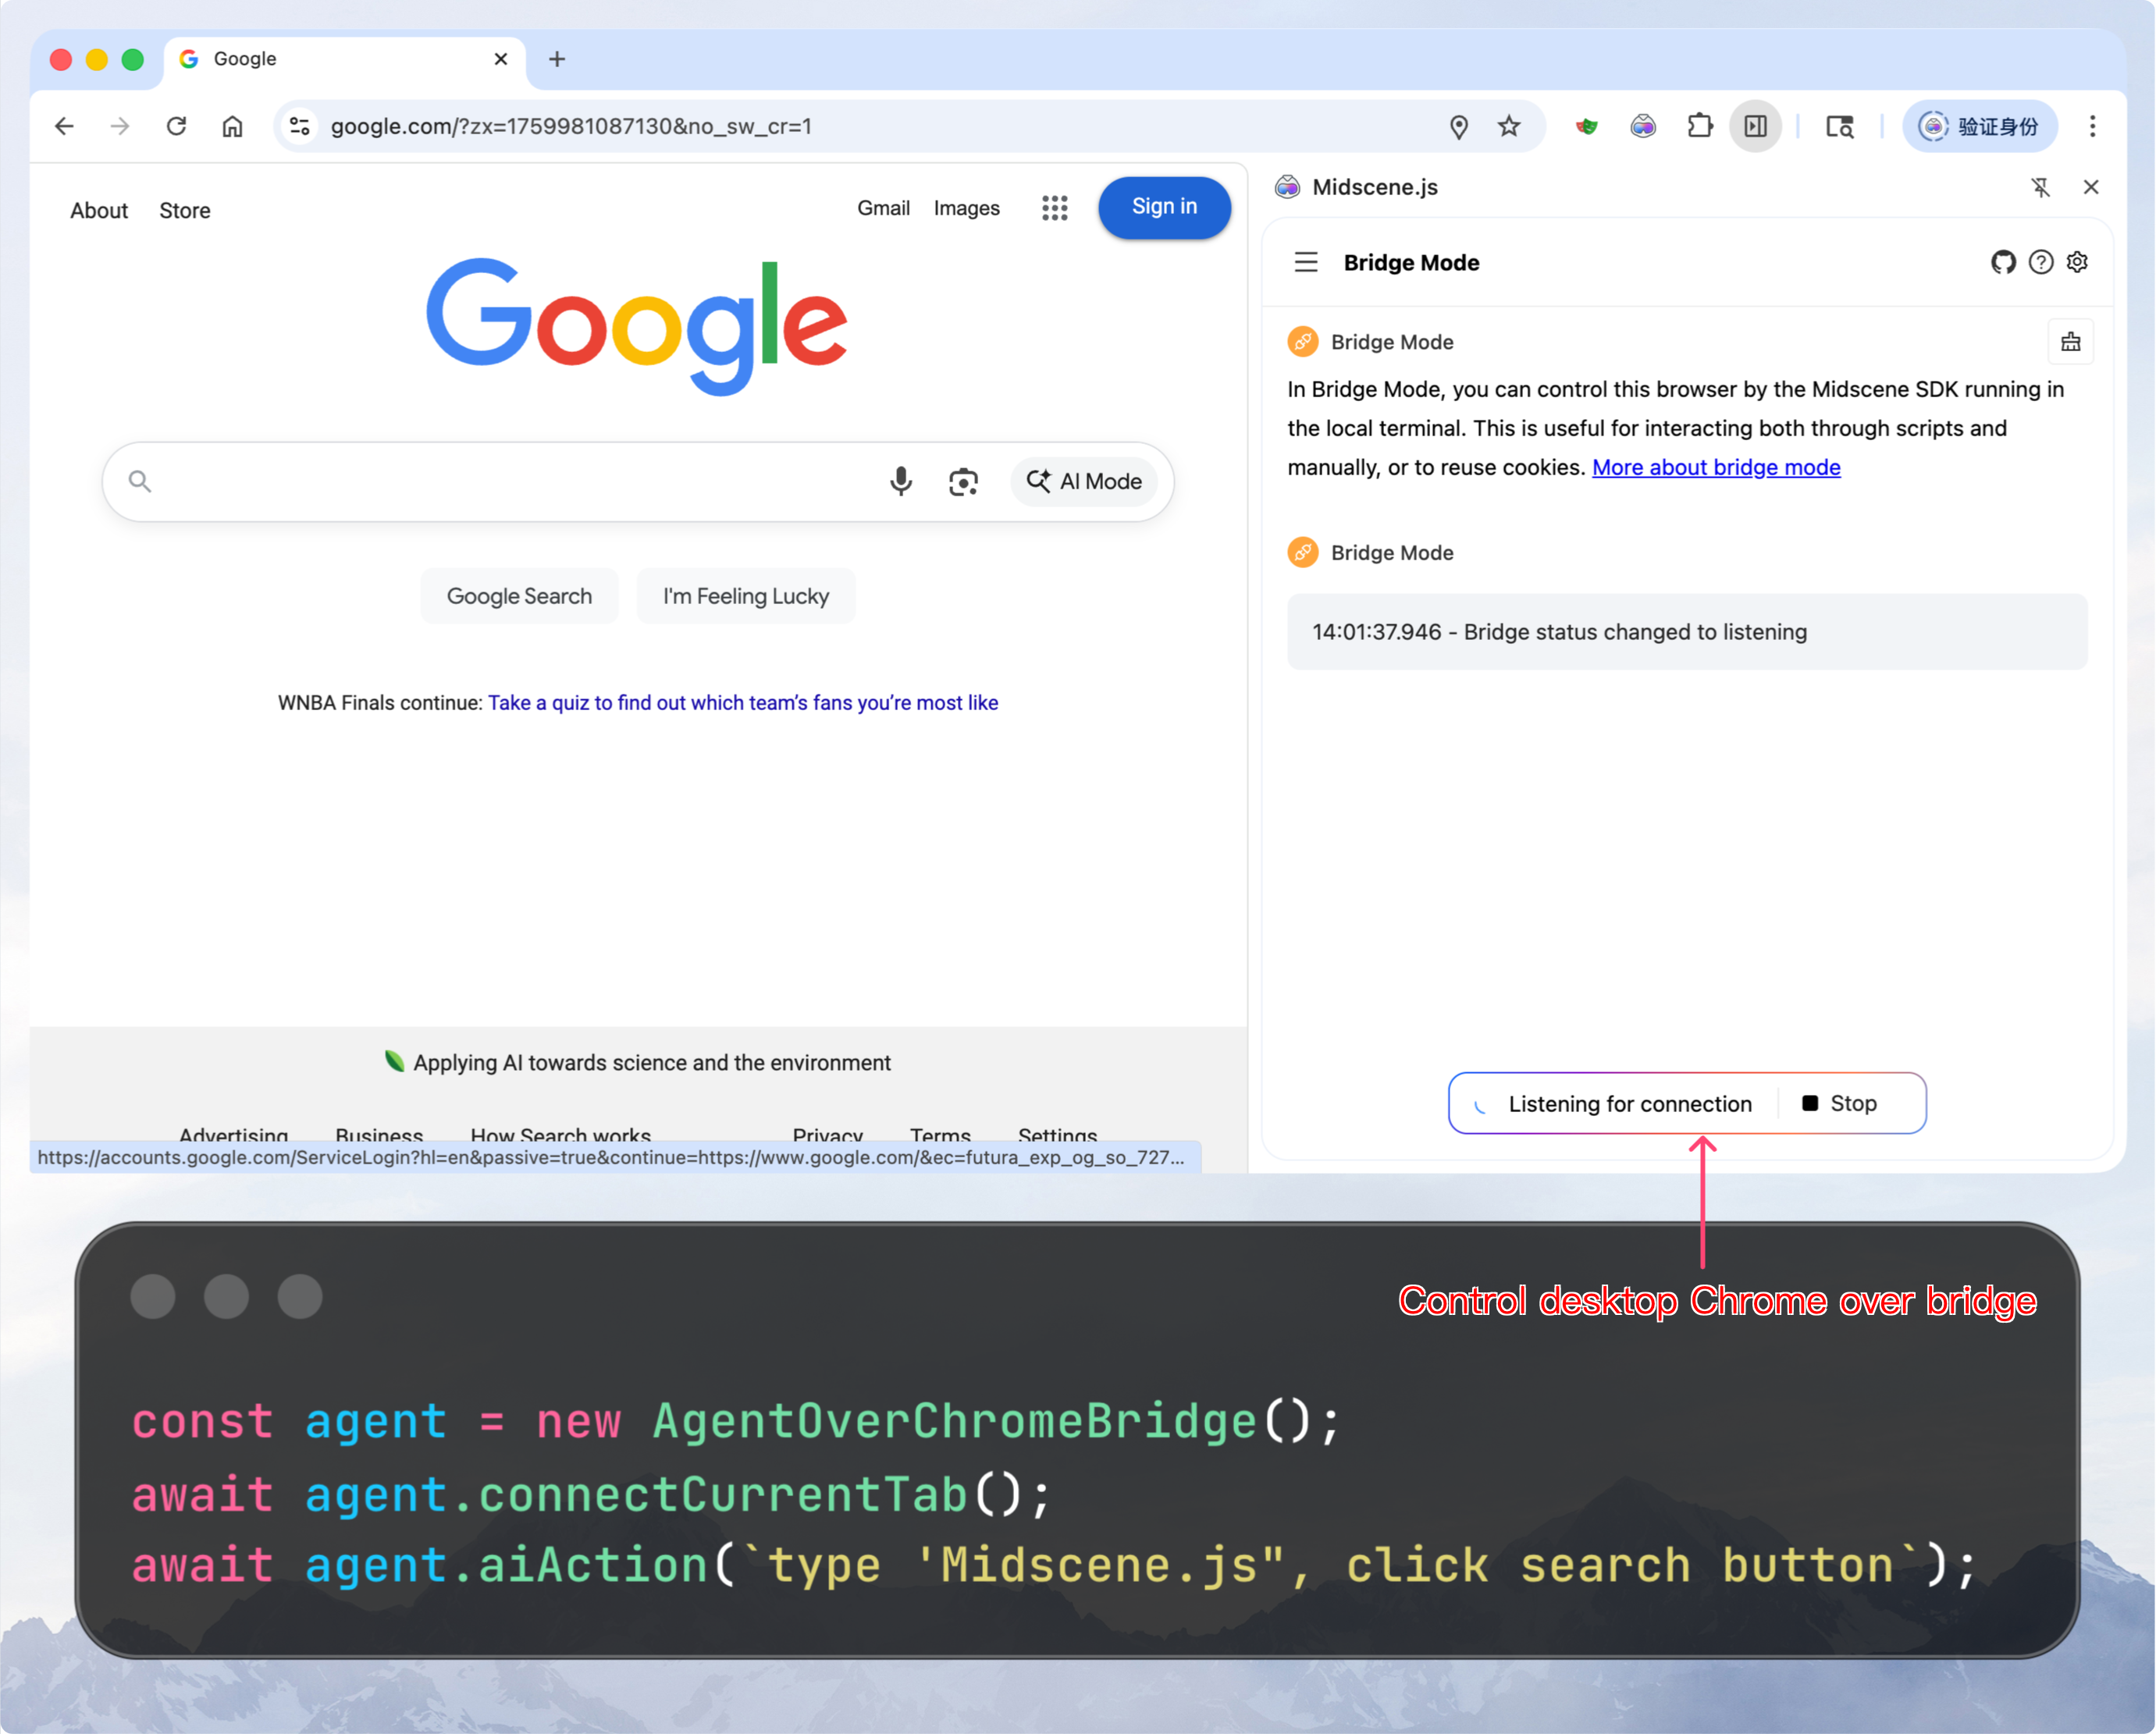
Bridge mode by Chrome extension
The bridge mode in the Midscene Chrome extension is a tool that allows you to use local scripts to control the desktop version of Chrome. Your scripts can connect to either a new tab or the currently active tab.
Using the desktop version of Chrome allows you to reuse all cookies, plugins, page status, and everything else you want. You can work with automation scripts to complete your tasks. This mode is commonly referred to as 'man-in-the-loop' in the context of automation.
check the demo project of bridge mode: https://github.com/web-infra-dev/midscene-example/blob/main/bridge-mode-demo
Set up API keys for model
Set your model configs into the environment variables. You may refer to Model strategy for more details.
For more configuration details, please refer to Model strategy and Model configuration.
In bridge mode, the AI models configs should be set in the Node.js side instead of the browser side.
Get started
Step 1. Install Midscene extension from Chrome web store
Install Midscene extension from Chrome web store
Step 2. Install dependencies
Step 3. Write scripts
Write and save the following code as ./demo-new-tab.ts.
Step 4. Run the script
Run your scripts
After running the script, the Chrome extension will pop up a confirmation dialog asking whether to allow the connection. Click "Allow" to allow the current connection, or click "Always Allow" to automatically allow all future connection requests (can be reset in the Bridge Mode panel). You should then see a new tab opened in your desktop Chrome, controlled by your scripts.
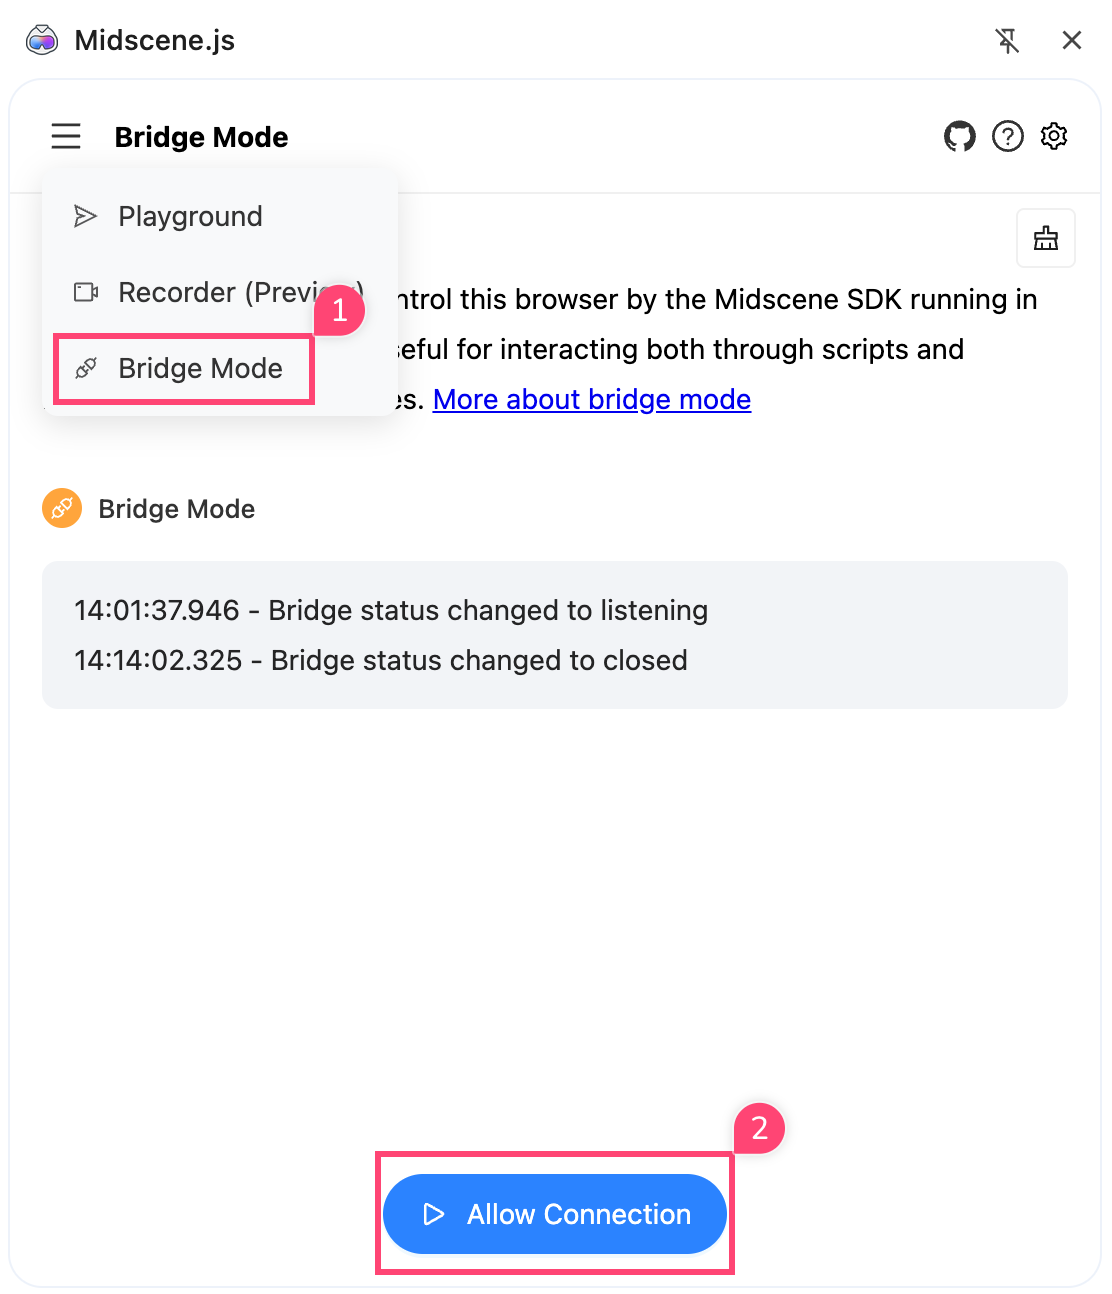
The extension listens for connection requests in the background by default, no manual action is needed. The extension icon will display a status badge: yellow dot for listening, green dot for connected.
Use bridge mode in YAML script
Yaml scripts is a way for developers to write automation scripts in yaml format, which is easy to read and write comparing to javascript.
To use bridge mode in yaml script, set the bridgeMode property in the web section. If you want to use the current tab, set it to currentTab, otherwise set it to newTabWithUrl.
Set closeNewTabsAfterDisconnect to true if you want to close the newly created tabs when the bridge is destroyed. This is optional and the default value is false.
For example, the following script will open a new tab by Chrome extension bridge:
Run the script:
After the script starts, click "Allow" in the confirmation dialog to proceed.
Unsupported options
In bridge mode, these options will be ignored (they will follow your desktop browser's settings):
- userAgent
- viewportWidth
- viewportHeight
- deviceScaleFactor
- waitForNetworkIdle
- cookie
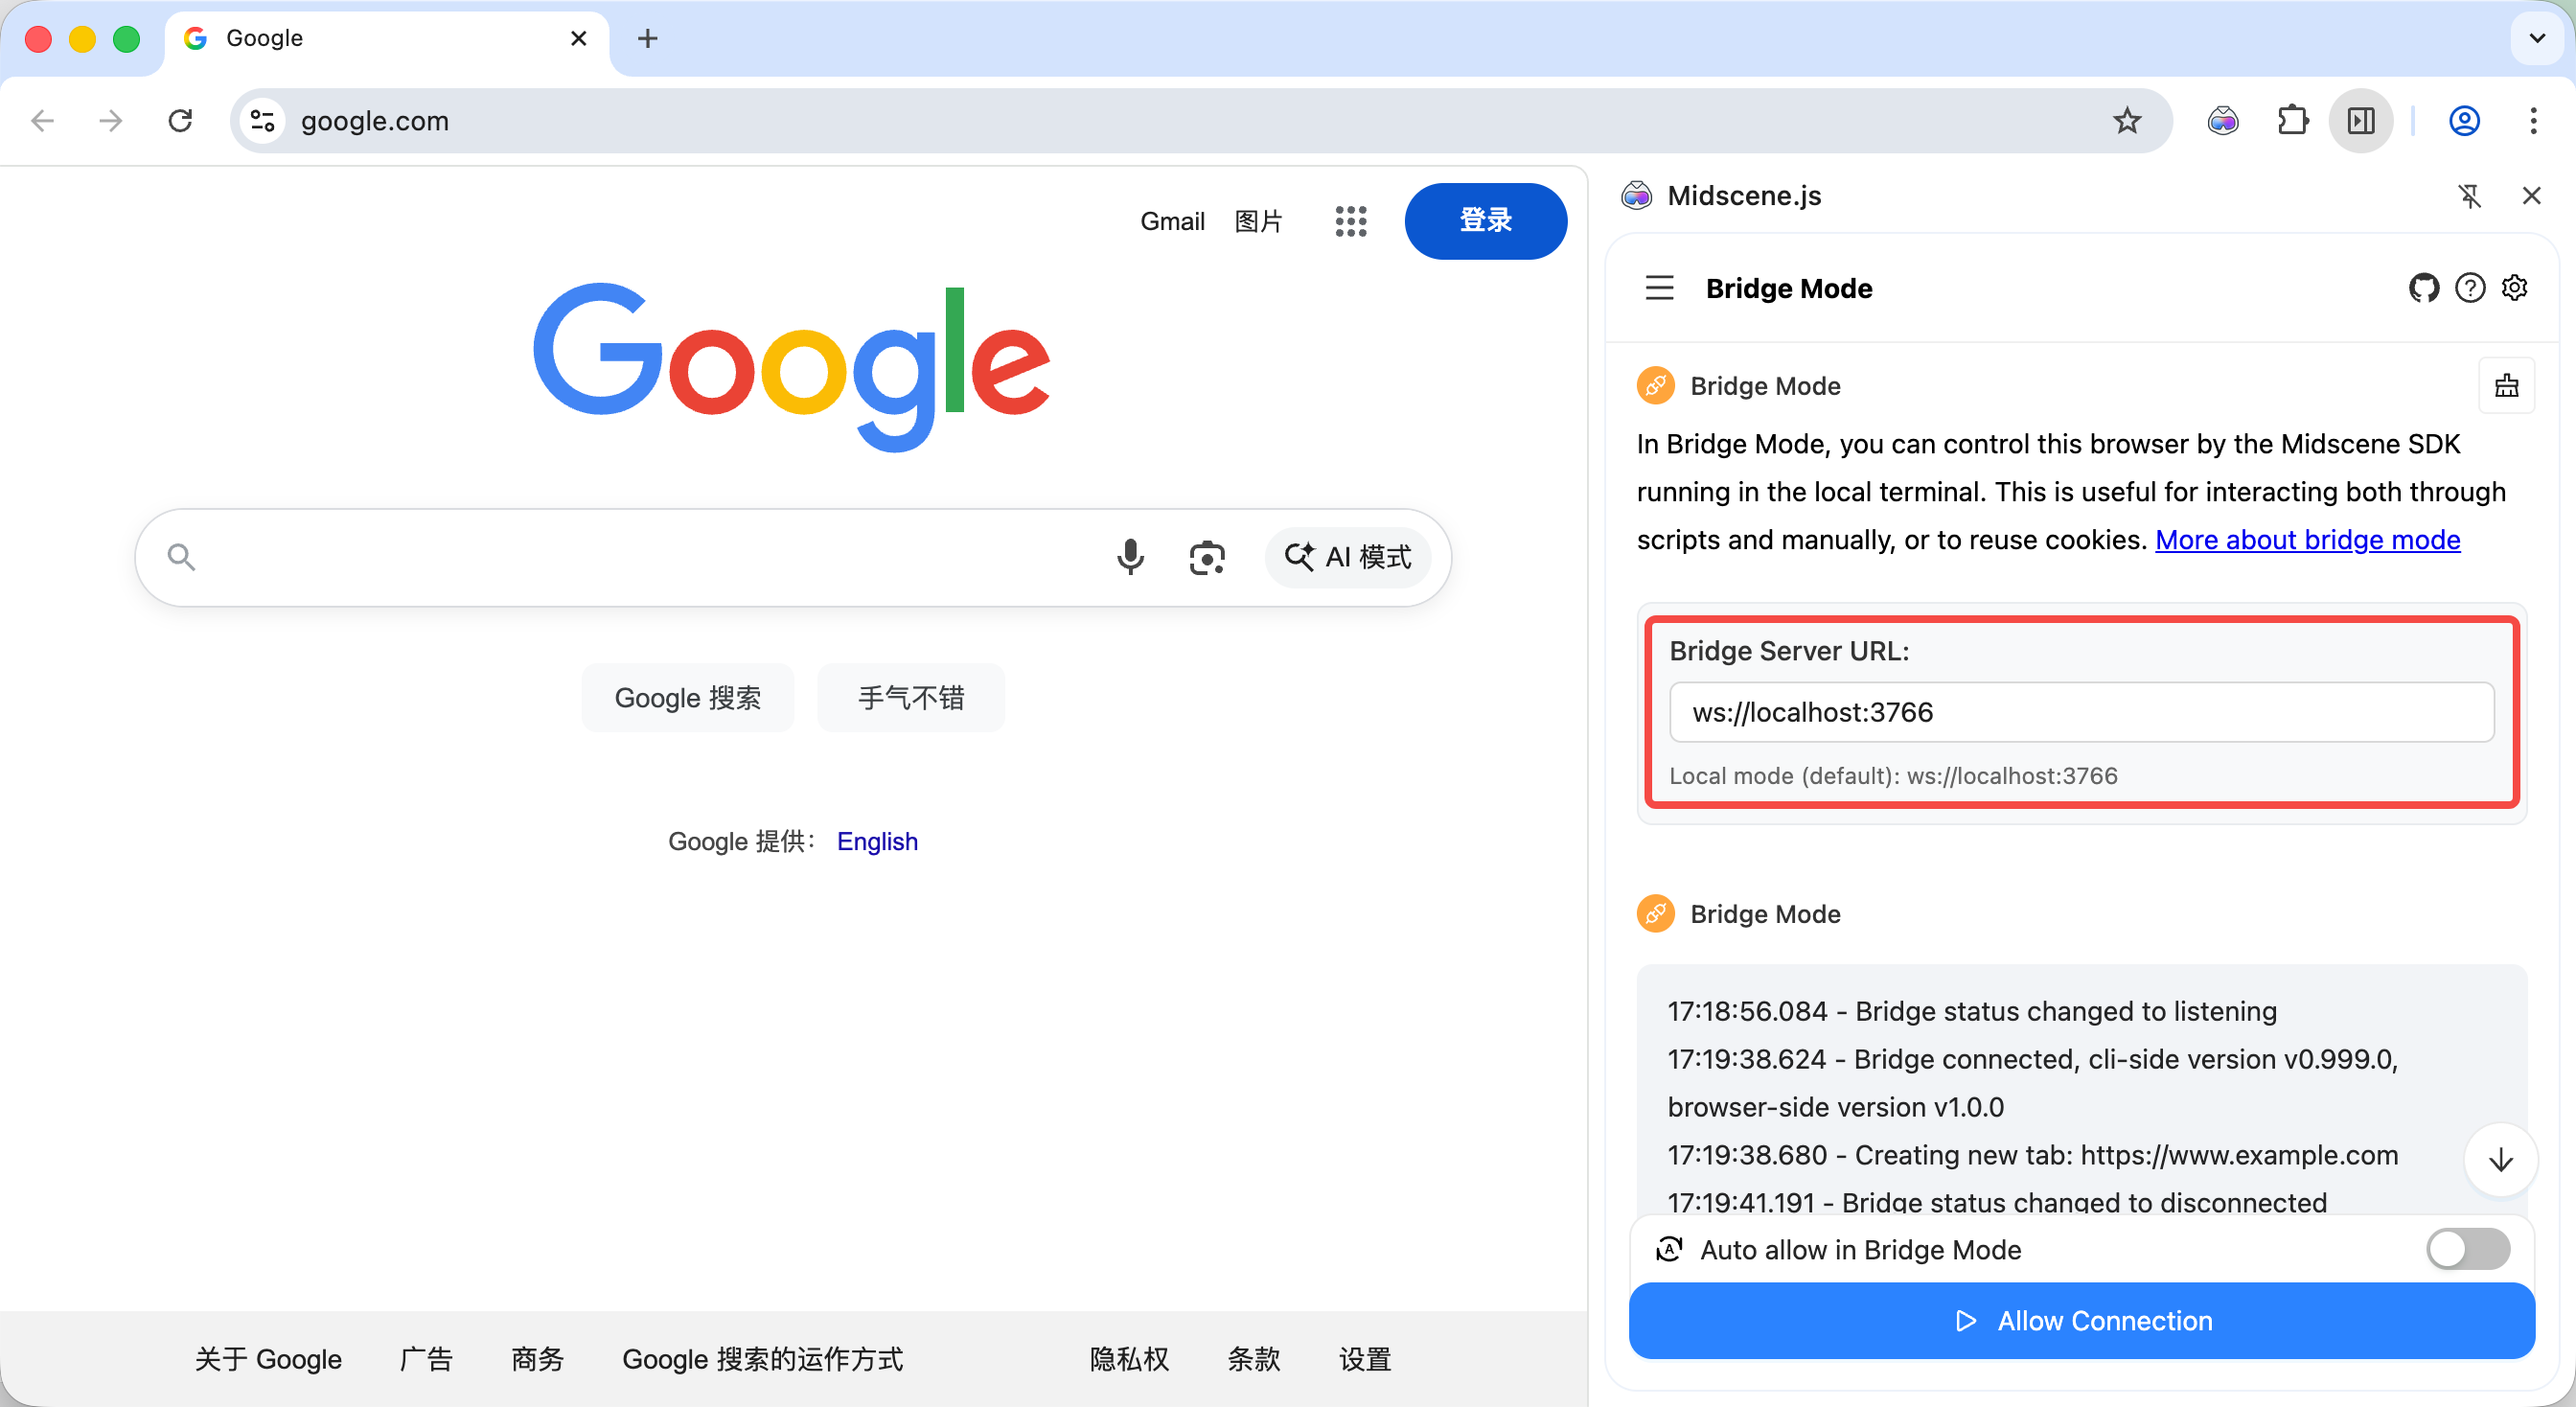
Remote Access Configuration
By default, the Bridge Server only listens on 127.0.0.1, allowing only local Chrome extension connections. If you need cross-machine communication (e.g., server on machine A, browser on machine B), you can enable remote access:
Server Side (Node.js Script):
Client Side (Chrome Extension):
- Open the Chrome extension's Bridge Mode page
- Fill in the server address in the "Bridge Server URL" input field
- Local mode:
ws://localhost:3766(default) - Remote mode:
ws://192.168.1.100:3766(replace with your server IP)
- Local mode:
- Run your script and click "Allow" in the confirmation dialog
When remote access is enabled, the Bridge Server will be exposed on the network. Please ensure:
- Only use in trusted network environments
- Use firewall to restrict access
- Do not use in public network environments to avoid security risks
FAQ
- Where should I config the model parameters (like
MIDSCENE_MODEL_API_KEY), in the browser or in the terminal?
When using bridge mode, you should config the model parameters in the terminal. For more configuration details, please refer to Model strategy.
More
- For every Agent method, check the API reference.
- For the full Chrome Bridge API surface, see API reference (Web).
- Demo project